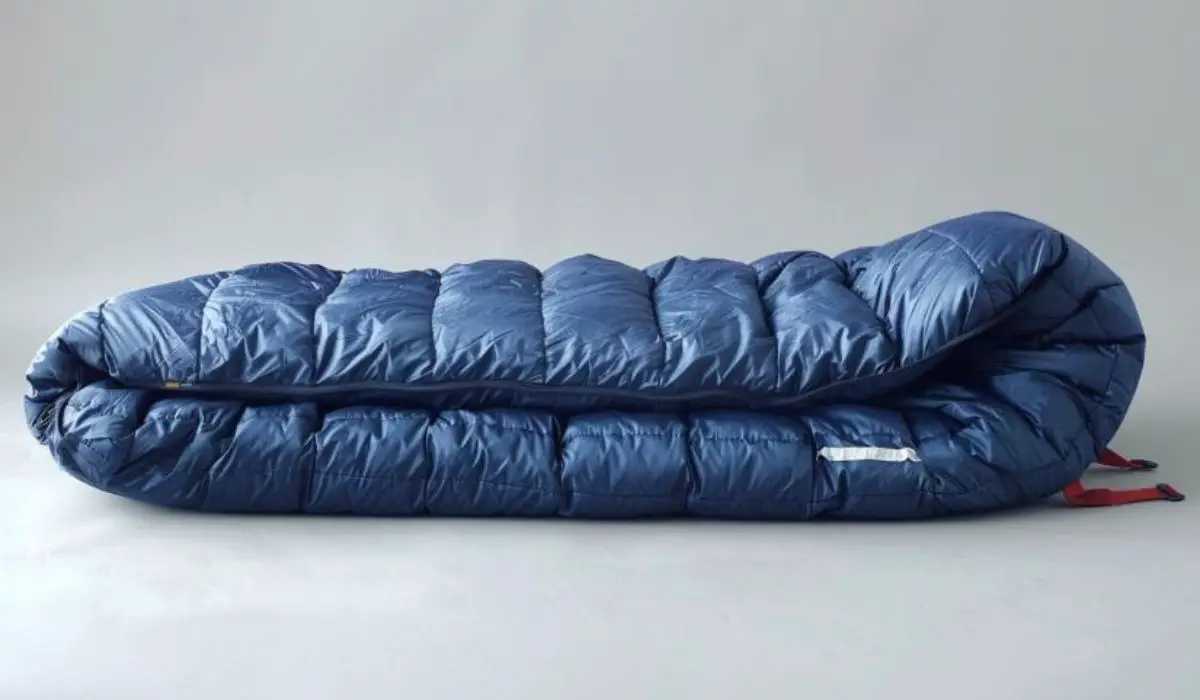
Have you ever wished you could create your own sleeping bag, perfectly tailored to your needs? Well, your wish is about to come true! In this comprehensive guide, we will show you exactly how to sew a sleeping bag from scratch. Whether you’re an experienced sewer or a beginner, our step-by-step instructions and helpful tips will make the process easy and enjoyable.
Imagine the satisfaction of snuggling up in a cozy sleeping bag that you made with your own two hands. No more settling for generic sleeping bags that don’t quite meet your preferences. With our DIY tutorial, you’ll have the power to create a sleeping bag that fits you like a glove and provides the utmost comfort during your outdoor adventures.
If you’re ready to embark on this exciting sewing project, keep reading and discover the secrets to sewing a sleeping bag that will be the envy of all your camping buddies. From choosing the right materials to adding personalized touches, we’ve got you covered every step of the way.
Key Takeaways:
- Learn how to sew your own sleeping bag, tailored to your comfort and preferences.
- Follow our step-by-step instructions and tips to make the process easy and enjoyable.
- Discover the essential supplies and materials needed for sewing a sleeping bag.
- Explore customization options to personalize your sleeping bag and make it truly unique.
- Ensure proper care and maintenance to prolong the life of your handmade sleeping bag.
Supplies and Materials Needed for Sewing a Sleeping Bag
In order to sew your own sleeping bag, it’s important to gather all the necessary supplies and materials beforehand. By having everything prepared, you’ll be able to efficiently work on your project without any interruptions. Here are the essential items you’ll need:
1. Outer Fabric:
The outer fabric is the material that will provide durability and protection to your sleeping bag. Choose a fabric that is sturdy and resistant to wear and tear. It’s recommended to opt for materials like nylon or polyester.
2. Inner Fabric:
The inner fabric will ensure comfort and insulation. Look for a soft and breathable fabric that will keep you warm during chilly nights. Popular choices include flannel, cotton, or a blend of natural and synthetic fibers.
3. Batting:
Batting is the layer of insulation that will keep you cozy while sleeping. It’s available in various thicknesses and materials like cotton, polyester, or down. Choose a batting that suits your insulation needs and preferences.
4. Dual Separating Zipper:
A dual separating zipper allows you to easily open and close the sleeping bag, making it convenient for getting in and out. Ensure that the zipper is long enough to extend along the entire length of the sleeping bag.
5. Optional Supplies:
Depending on your preferences, you may want to consider additional supplies to enhance the aesthetics and functionality of your sleeping bag. These include:
Embroidery Thread: If you enjoy adding personal touches, consider using embroidery thread to add decorative stitches or patterns to your sleeping bag.
Fabric-Safe Paint: Adding fabric-safe paint can help you create unique designs or personalize your sleeping bag further.
The amount of fabric and batting required will depend on whether you’re making an adult or child-sized sleeping bag. Be sure to calculate the necessary measurements based on the dimensions of your desired sleeping bag.
By gathering these supplies and materials, you’ll be well-prepared to start sewing your very own sleeping bag.
Step-by-Step Instructions for Sewing a Sleeping Bag
Now that you have gathered all your supplies and materials, it’s time to dive into the step-by-step process of sewing your very own sleeping bag. Follow these detailed instructions and sewing tips to ensure a successful and enjoyable sewing experience.
Cutting and Stitching the Fabric Pieces
Start by laying out your outer fabric, inner fabric, and batting. Use a fabric marker to trace the desired shape and size of your sleeping bag onto the outer fabric. Cut along the marked lines, making sure to leave additional seam allowance. Repeat the process with the inner fabric and batting, ensuring they are the same size as the outer fabric.
Place the outer fabric right side up on a flat surface, followed by the batting and then the inner fabric, making sure all edges align properly. Pin the layers together to hold them in place. Using a sewing machine, stitch along the edges to secure the layers together, leaving a small opening for turning the fabric right side out later.
Layering the Fabrics and Batting
After stitching the fabric layers together, carefully trim any excess batting and fabric from the edges, ensuring a clean and even appearance. This step will also make it easier to sew the perimeter later. Take the time to press the fabric layers with an iron, smoothing out any wrinkles.
Sewing the Perimeter
Starting at the opening you left earlier, sew along the perimeter of the sleeping bag using a straight stitch or a decorative stitch if desired. Make sure to backstitch at the beginning and end to secure the stitches. Take your time to ensure the layers are aligned and the stitches are straight.
Turning the Fabric Right Side Out
Through the opening you left earlier, gently pull the fabric layers out to turn the sleeping bag right side out. Carefully poke out the corners using a chopstick or a blunt object, ensuring they are fully shaped. Take a moment to admire the progress you’ve made so far!
Sewing the Zipper
Prepare the dual separating zipper by attaching the appropriate ends to the sleeping bag opening. Use pins to secure the zipper in place, making sure it is evenly aligned. With a zipper foot on your sewing machine, stitch along both sides of the zipper, ensuring it is securely attached to the sleeping bag, and functioning properly.
Finishing the Bag
Close the opening you left earlier by stitching it closed using either a ladder stitch or a slip stitch. This invisible stitching technique will ensure a neat and professional finish. Give the sleeping bag a final press with an iron, adjusting any wrinkles or folds.
Congratulations! You’ve successfully sewn your own sleeping bag using our step-by-step instructions and sewing tips. Your finished product is ready to provide comfort and warmth during your next camping adventure or sleepover. Before you pack it up, make sure to test it out and admire your craftsmanship. Happy sewing!
Customization and Finishing Touches for Your Sleeping Bag
Once you’ve completed the basic construction of your sleeping bag, it’s time to add your personal touch and make it truly unique. Customizing your sleeping bag allows you to showcase your creativity and make it a reflection of your own style and preferences.
Hand-Tied Embroidery and Paint Designs
Add a touch of elegance and individuality to your homemade sleeping bag by incorporating hand-tied embroidery or paint designs. These artistic details can be added to the fabric panels or even the sleeping bag’s outer shell.
Using high-quality embroidery thread and a needle with a sharp point, you can create intricate patterns or monograms that will make your sleeping bag stand out. If embroidery isn’t your forte, consider using fabric-safe paint to decorate the sleeping bag with unique designs or patterns.
Additional Adjustments and Personalization
Aside from embroidery and paint, there are various other ways to customize your sleeping bag. You can add pockets or compartments for storing small essentials like a flashlight or phone, attach a small loop for hanging your sleeping bag, or incorporate adjustable straps to make it easier to carry around.
Moreover, you can experiment with different fabric combinations, patterns, or prints to further personalize your sleeping bag. Consider using coordinating fabrics for the inner and outer layers or choosing a bold, eye-catching pattern that reflects your personality.
Tips for Proper Care and Maintenance
Proper care and maintenance are crucial for ensuring the longevity of your homemade sleeping bag. To keep your sleeping bag in pristine condition, always follow the manufacturer’s care instructions, if applicable, or use the following general tips:
1. Clean it regularly: Depending on the fabric, you may be able to machine wash or hand wash your sleeping bag. Remember to use a gentle cycle and mild detergent. Air drying is usually recommended.
2. Store it properly: When not in use, store your sleeping bag in a cool, dry place. Avoid compressing it for extended periods, as this can damage the insulation material.
3. Repair any damage: Check your sleeping bag regularly for any rips, tears, or loose stitches. Repair them promptly to prevent further damage.
4. Use a sleeping bag liner: Consider using a sleeping bag liner to protect the inner fabric from dirt, sweat, and oil. This can also make it easier to clean and maintain your sleeping bag.
By customizing your sleeping bag and implementing proper care and maintenance, you can ensure that it remains in excellent condition for years to come. Enjoy the comfort and warmth of your personalized sleeping bag on your next camping trip or outdoor adventure!
Conclusion
Now that you’ve completed the process of sewing your own sleeping bag, you can enjoy the satisfaction of creating a high-quality and personalized sleep solution. By following our DIY guide and incorporating our expert tips, you’ve learned how to create a comfortable and durable sleeping bag tailored to your specific needs and preferences. Whether you’re planning a camping trip, a sleepover, or want to give a unique gift, your handmade sleeping bag will provide both comfort and joy.
Remember, your sewing skills are not limited to just sleeping bags. The techniques you’ve acquired throughout this sewing process can be applied to various other sewing projects, allowing you to explore your creativity and tackle new challenges. The sense of accomplishment and satisfaction that comes from creating something with your own hands is invaluable.
Now that you possess the knowledge and skills to sew your own sleeping bag, don’t be afraid to experiment with different fabrics, colors, and patterns to make your creation truly unique. And don’t forget to properly care for and maintain your sleeping bag to ensure its longevity. With each stitch, you’re not only creating a practical item but also weaving cherished memories of crafting and accomplishment.


